Thursday, November 18, 2010

Free Blogspot Templates: Blog Theme

Preview
  • From your Blogger dashboard, go to Design | Edit HTML
  • Make sure to back up your old template before install this new one by click on the "Download full template"
  • Check on the "Expand Widget Templates"
  • Now copy/paste this code to replace all the code in the HTML code section
  • Click Save Template button and you're done.

Wednesday, November 17, 2010

How to adding Facebook button after every of your Blogger posts

The Faceook Like button lets a user share your content with friends on Facebook. When the user clicks the Like button on your site, a story appears in the user's friends' News Feed with a link back to your website.

When your Web page represents a real-world entity, things like movies, sports teams, celebrities, and restaurants, use the Open Graph protocol to specify information about the entity. If you include Open Graph tags on your Web page, your page becomes equivalent to a Facebook page. This means when a user clicks a Like button on your page, a connection is made between your page and the user. Your page will appear in the "Likes and Interests" section of the user's profile, and you have the ability to publish updates to the user. Your page will show up in same places that Facebook pages show up around the site (e.g. search), and you can target ads to people who like your content.

Here is how to adding Facebook button after every of your Blogger posts:
  • From your Blogger Dashboard, go to Design | Edit HTML
  • Check on the Expand Widget Templates
  • Scroll and find the code <data:post.body/> then copy/paste this code after it:
    <iframe allowTransparency='true' expr:src='&quot;http://www.facebook.com/plugins/like.php?href=&quot; + data:post.url + &quot;&amp;layout=standard&amp;show_faces=false&amp;width=100&amp;action=like&amp;font=arial&amp;colorscheme=light&quot;' frameborder='0' scrolling='no' style='border:none; overflow:hidden; width:450px; height:40px;'/>
  • Click Save Template and you're done.

Wednesday, November 10, 2010

Magazine Style Drop Caps

Dropcaps like in a fancy magazine is what you see in this post. If you like this tip, just follow this guide step by step.

Go to Design | Edit HTML in your Blogger Dashboard, and then paste the code below to your CSS-definitions between the HEAD tag.


Now in every of your posts, you need to put the fisrt letter between the tag SPAN like this: <span class="dropcaps">D</span> in Edit HTML section. The result is very nice: a large capital that stretches over 5 lines in your post.

Remember that you can change the font size bigger or smaller or setting the color in different from the code above if you want.

* Tips: To make it easier, Post Template will help you save your time by pre-formatting the post editor with text or code that will appear each time you create a new post.
  • In your Blogger Dashboard, go to Settings | Formatting then scroll down and you'll see the Post Template section at below of the page.
  • Copy/paste your text or code that you want to edit here.
  • Click Save Settings to save your changes.
Here is an example for Dropcaps hack in this article:

Wednesday, October 13, 2010

Adding recent comments to your blogger blog by using Feed URL

It's easy to add your blog's recent comments to your blogger blog by using Feed URL for now.
  • From your Dashboard blog, go to Design | Add a Gadget in Page Elements panel
  • Choose Feed then paste your Feed comment URL here: http://yourbloggerblog.blogspot.com/feeds/comments/default. Remember to change this URL to your own domain name.

  • Click COUTINUE and choose any options that you want to display on your blog: number of comments, authors, dates

  • Click SAVE to done your work
Enjoy! :-)

Sunday, October 10, 2010

How to change the date or time of your post?

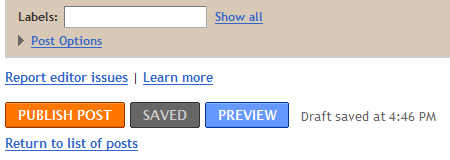
The date and time settings for a post are beneath the post-editing field, just click the "Post Options" link:


This will reveal some more settings for your post, including the date and time, which are on the right-hand side. Once you've selected a new date and time, be sure to publish your post.

With automatic date and time, your posts will now be timestamped with the date and time that they’re published, not the date and time when you first opened the post editor (as has been the case). You can of course still explicitly set the date and time by opening Post Options and switching to Scheduled at instead. Once a post is published, it will keep its date by default, even if you go back even if you go back to edit the post and re-publish.

Saturday, September 18, 2010

How to put Facebook Badges to your Blogger blog

Facebook can easily be integrated into almost every aspect of your life, from mobile phones to personal Web sites. Put your badge on a site and it will be automatically updated and visible to anyone (even non-Facebook users). This is great for signatures on a forum or as a sidebar on your own Web site.

Now, it's easy for you to put your Facebook badge on your own Blogger blog.
  • Login to your Facebook account
  • Go to the Facebook Badges pages
  • Choose the badge you want to put on your Blogger blog
  • Click on the Blogger icon on Preview page to put it on your blog
  • You're done
Create a Custom Badge
  • After choosing a badge to put on your blog, click on "Edit this badge" on Preview page
  • Set the basic layout and format
  • Add any items from the drop-down menu that you want to include in your badge. Click the "Add Item" button to add it to your badge. You may add more than one item. With no template, you can add anything you want to your badge. It will preview as you make additions.
  • Hit the "Save" button to complete your badge and get the necessary code to post it.

There're 4 Facebook badges for now:
  • Profile Badge Share your Facebook information on other websites
  • Like Badge Show off your favorite Pages on your website or blog
  • Photo Badge Share your Facebook photos on other websites
  • Page Badge Share your Facebook Page information on other websites

Saturday, September 11, 2010

Blogging from iGoogle and Gmail

The Blogger Posting gadget makes it easy to post to your blog from the convenience of Gmail or your iGoogle homepage.


To add the Blogger Posting Gadget to your iGoogle page, simply click this button:

Add to Google

Then click the blue "Add to Google" button. Make sure that you're signed in with the same Google account that you use for Blogger. Once you've added the Blogger Posting Gadget you will see the gadget on your iGoogle page:

To add the Blogger Posting Gadget in Gmail, you'll first have to enable the Add Gadget by URL lab feature from your settings:


Once you've enable this Labs feature, then you can add the posting gadget by simpling entering its URL into the Gadget tab in your Settings. Here's the URL:

http://www.blogger.com/gadgets/post.xml

In the top right corner of the gadget you will see the title of your blog. If you have more than one blog, there will be a drop-down menu in the corner so you can select the blog you'd like to post to. You can then enter a title and write a post. You also have the option to add labels to your post as well. Once you have finished writing your post, click "Publish" to publish your post or click "Save Draft" to save your post back to Blogger without publishing it.

Tips:
  • The gadget supports editing the HTML of title and body.
  • If you start writing a post and decide you want to upload images or use other rich text features, just click "Save Draft". The gadget will save your post, then give you a link to directly edit the post in Blogger.
  • The gadget works in Firefox, Chrome, Safari 3, Internet Explorer and on the iPhone.

Friday, September 3, 2010

Free Blogspot Templates: Blogger Addicted

Preview
  • From your Blogger dashboard, go to Design | Edit HTML
  • Make sure to back up your old template before install this new one by click on the "Download full template"
  • Check on the "Expand Widget Templates"
  • Now copy/paste this code to replace all the code in the HTML code section
  • Click Save Template button and you're done.

Tuesday, August 31, 2010

Stats Gadgets

After launched the Blogger Stats to Blogger in Draft, Blogger staff has created two new gadgets that you can add to your blog to show your readers interesting stats from your blog: Blog’s stats and Popular Posts gadgets.

The data for these gadgets is automatically taken from Blogger Stats. To use them, go to Design | Page Elements, and click on “Add a gadget.”


The Blog’s stats gadget displays total pageviews* of your blog. The gadget comes in different styles and also features an optional sparkline graph.
(* The pageviews are counted from when Blogger rolled out the Stats feature, not from the first day your blog was created.)


The Popular Posts gadget helps your readers quickly find out which of your posts have been viewed the most by your readers. The gadget also comes with several different styles and configurations.


The new Stats gadgets are available now on Blogger in Draft, so you can go ahead and give them a try now.

* Tips:

In the Blog's Stats gadget, you can choose the time window of your pageview counts (All Time, Last 30 days, Last 7 days)

In the Popular Post gadget, you can now choose the number of posts you want the gadget to display.